Use this topic for a guided tour of the main IRT Cronista functions. The workflow shows how to find and review infrared images in Organizer mode, open an image in Analyzer mode, and create a Microsoft Word report. You can follow the tour with your own inspection images or use the supplied sample images as optional practice material.
Before you start
Install and activate the software before continuing. See Installation notes and Activating licenses.
To create a report, install a supported desktop version of Microsoft Word. See System requirements.
Tip: To explore IRT Cronista without using your own inspection data, open the supplied sample images. They are typically stored in Documents > Infrared Samples for the account used to install the software. The samples provide ready-made content for exploring the interface; you do not need to analyze or modify them. |
Explore Organizer mode
Use Organizer mode to browse inspection folders, preview images, review file information and notations, link infrared and visual images, and manage inspection data.
1.Select Organizer on the main toolbar.
2.In the Folders window, select a folder that contains infrared images.
3.In the Folder Contents window, select an infrared image.
4.Review the infrared image and any linked visual image in the Preview window.
5.Select the File Info tab to review file, camera, and temperature information.
6.Select the Notations tab to review inspection information.
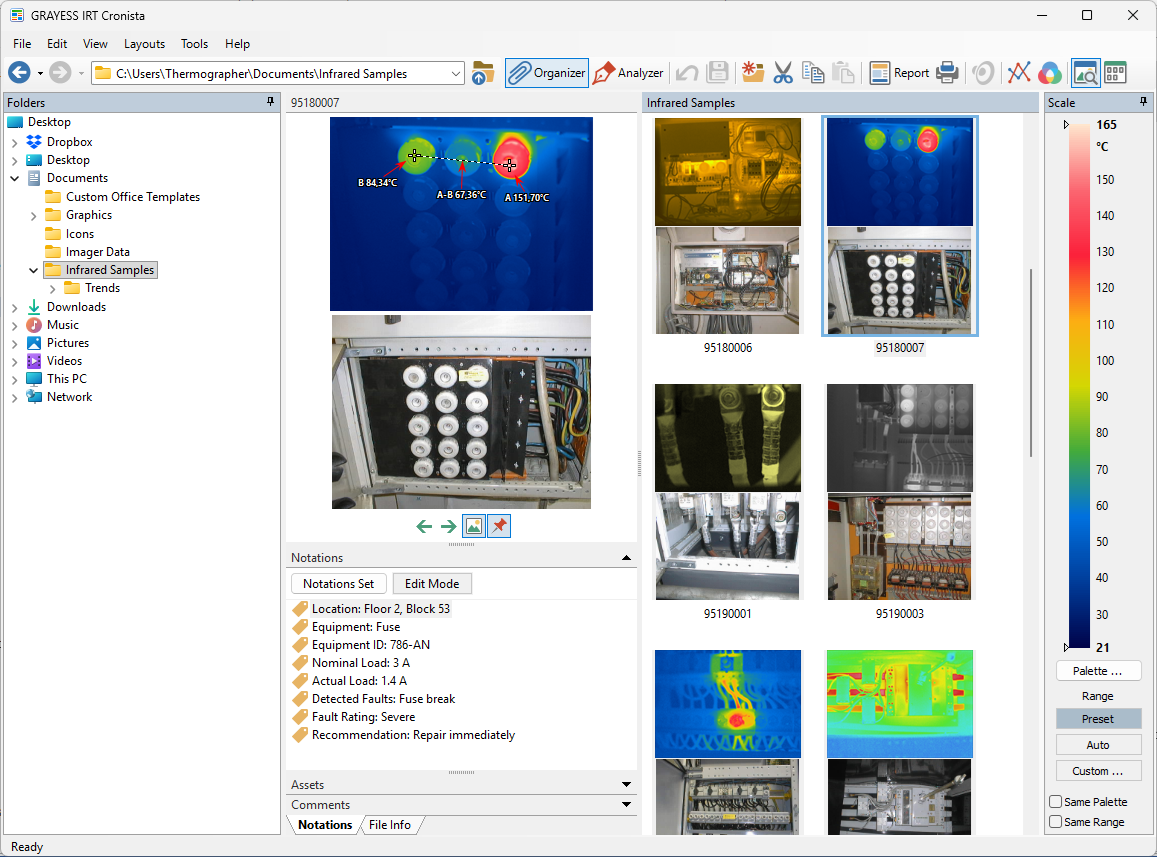
For more information about organizing inspection data, see Organizer mode overview.
Explore Analyzer mode
Use Analyzer mode to adjust how an infrared image is displayed, review temperature data, and add measurement objects such as spots, lines, and areas. Some supplied sample images already contain measurements and notations, so you can explore Analyzer mode without changing them.
With an infrared image selected in the Folder Contents window, select Analyzer on the main toolbar:

Practice: add a spot measurement
1.Select the Spot tool.
2.Click the required location in the infrared image.
3.Review the temperature displayed beside the new spot.

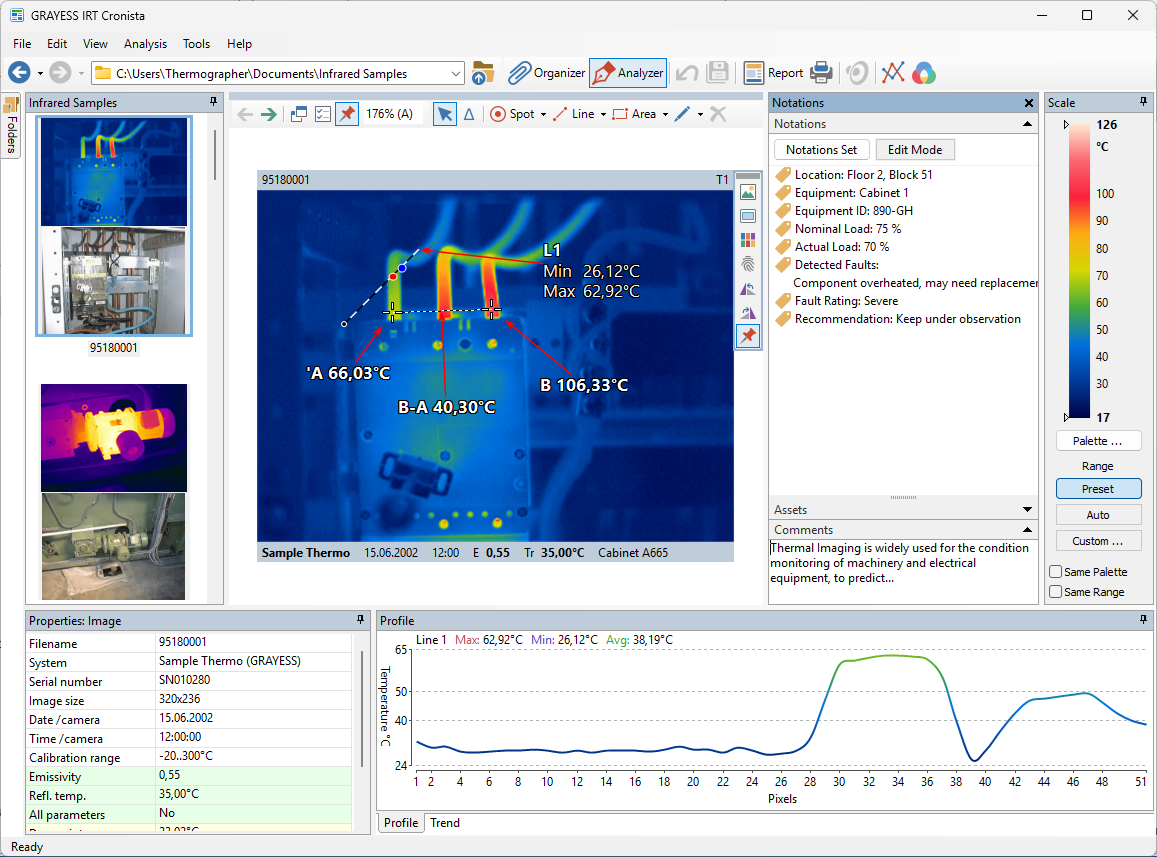
For more information about analysis functions and workspace elements, see Analyzer mode overview.
Create a report
IRT Cronista uses Microsoft Word templates to create editable inspection reports. The following procedure creates a report for all infrared images in the active folder. You can use a folder that contains your own images or the supplied samples.
To create a report for the active folder: 1.Select Organizer on the main toolbar. 2.Select the folder that contains the infrared images for the report. 3.Select Create Report button 4.Select a report template in the Template Selection dialog.
5.Select Run. 6.Review the generated report in Microsoft Word. 7.Make any required changes to the report. 8.Save the document. |
 on the main toolbar.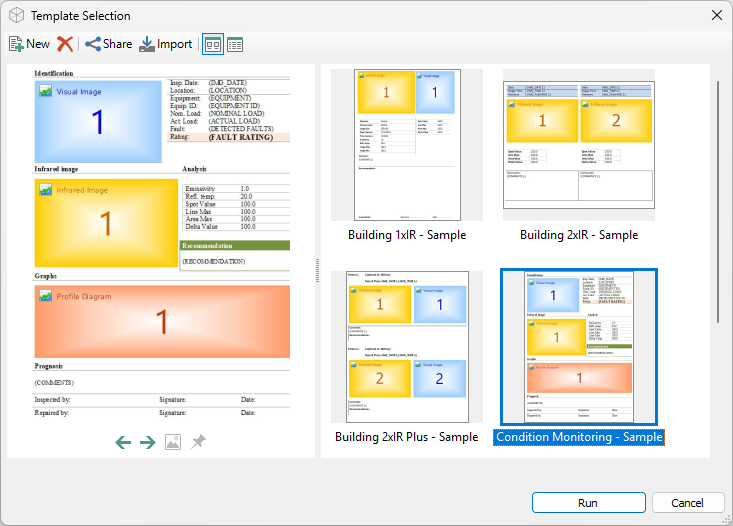
A report can include infrared and visual images, measurements, notations, profiles, histograms, and other inspection information.
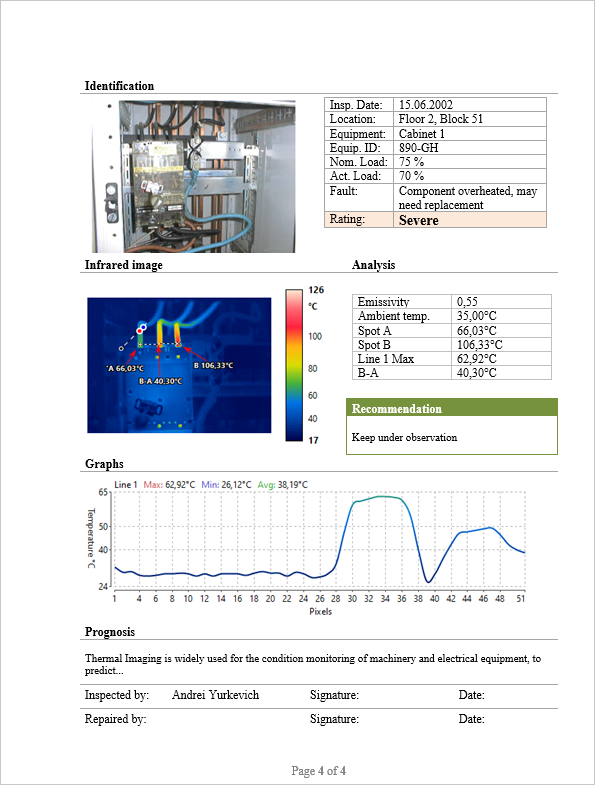
For instructions for reporting one image or a selection, see Generating reports for an image, folder, or selection. For information about report templates and generation options, see Generating reports using templates.