Fusion combines the temperature information in an infrared image with details from its visual counterpart. Use it to relate thermal patterns to visible components, labels, and other scene features. Fusion changes only the image display; it does not change temperature data or measurement results.
The Fusion command is available when the focused infrared image has a visual counterpart and contains the alignment information required for fusion. Fusion settings apply only to the focused image.
Fusion effects
Transparency blending: Blends the infrared and visual images. This can show the location of a thermal pattern within the visible scene.
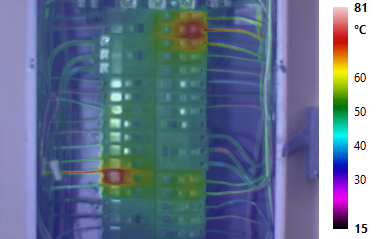
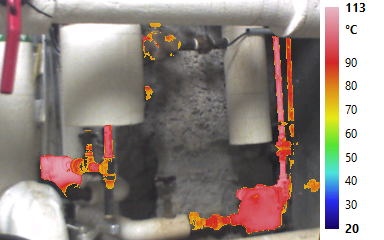
Alarm range: Displays infrared information only for temperatures that meet a selected condition. The visual image appears in the remaining areas.
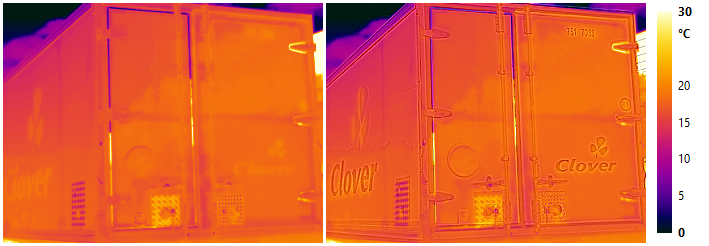
Details enhancement: Adds edges and fine details from the visual image to the infrared image.
Open the Fusion dialog
1.Click the infrared image to give it focus.
2.Select View > Fusion, or right-click the image and select Fusion.
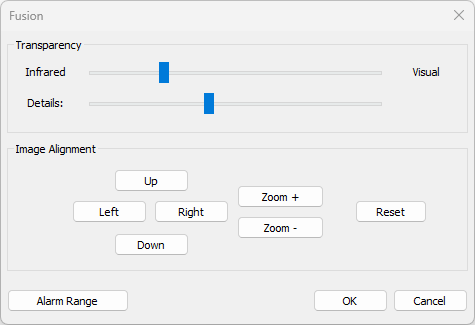
The image preview updates as you adjust the settings. Click OK to keep all changes, or click Cancel to restore the settings that were in effect when you opened the dialog.
Adjust transparency and details
·Transparency: Move the upper slider toward Infrared to show more of the infrared image, or toward Visual to show more of the visual image.
·Details: Move the lower slider to the right to add more visual-image detail. Move it fully to the left to remove the enhancement.
Align the images
If corresponding features do not overlap, move the transparency slider to an intermediate position so that you can see both images. Then use the Image Alignment controls:
·Left, Right, Up, and Down move the visual image.
·Zoom + and Zoom - resize the visual image.
·Reset restores the alignment that was in effect when you opened the Fusion dialog.
You can also use the arrow keys to move the visual image and the plus and minus keys to resize it while the Fusion dialog is open.
Set an alarm range
An alarm range keeps the infrared layer visible for temperatures that meet a selected condition and makes it transparent elsewhere.
1.Click Alarm Range.
2.Select the Enable check box.
3.Select a temperature condition.
4.Enter the enabled temperature limit or limits.
5.Optionally, select the One color check box.
6.Click OK.
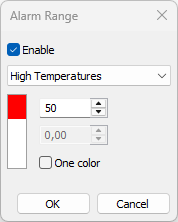
The available conditions are:
·High Temperatures: Shows infrared information above the specified upper limit.
·Low Temperatures: Shows infrared information below the specified lower limit.
·Temperature Range: Shows infrared information between the lower and upper limits.
·High and Low Temperatures: Shows infrared information below the lower limit and above the upper limit.
When One color is selected, the matching infrared areas use fixed alarm colors instead of the image palette. The color indicator in the dialog shows the color or colors used for the selected condition.
Use Picture In Picture
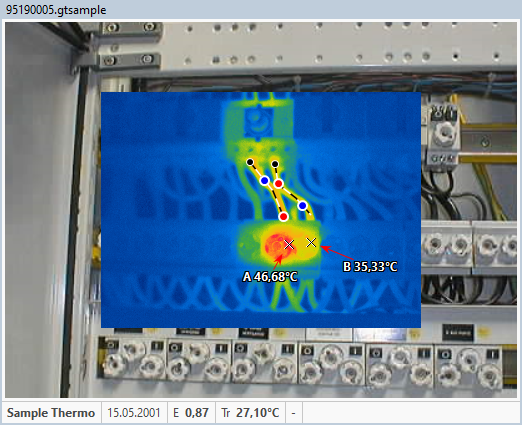
Picture In Picture displays the full visual image with the infrared image overlaid in its corresponding position. When this option is cleared, visual-image areas outside the infrared image's field of view are hidden.
Select View > Picture In Picture or click the Picture In Picture button on the analysis toolbar. Select the command or button again to return to the cropped view.
Remove all fusion effects
1.Open the Fusion dialog.
2.Click Alarm Range.
3.Clear the Enable check box.
4.Click OK.
5.Move the transparency slider fully toward Infrared.
6.Move the Details slider fully to the left.
7.Click OK.